03 December, 2018

Interior Mapping Shader for Unity3D

After doing yesterdays writeup i went and cleaned up my unity shader for interior mapping.

But as you can see an oddity popped up. In the preview (bottom right) everything looks fine and dandy, but in the scene it suddenly gets uggly jagged edges. this has apprently to do with my choice of using tex2D for texture sampling, which is trying to use MIP-maps. Due to the procedural nature of our shader this fails miserably though. by replacing the lookup with tex2Dlod(tex,float4(uv,0,0)) this is rectified. This always samples the biggest resolution, which results in a performance hit, but fixes those ugly edges.

I'm not a shader artist, i just have fun fiddling with shaders, and i know that there are techniques to fix this properly and without performance hit (even applying AA across the seams) but to this day i cant wrap my head around those, so i cant modify my shader to utilize them. maybe someone else can help me there. anyway here is the code:


Shader "Custom/Interior Mapping Raytrace" {
 Properties{
  _Color("Color", Color) = (1,1,1,1)
  _TextureAtlas("Texture Atlas(RGB)",2D) = "white"{}
 }
  SubShader{
   Tags { "RenderType" = "Opaque" }
   LOD 200

   CGPROGRAM
  #pragma surface surf StandardSpecular

  // Use shader model 3.0 target, to get nicer looking lighting
  #pragma target 3.0

  sampler2D _TextureAtlas;

  struct Input {
   float3 viewDir;
   float3 worldPos;
  };

  fixed4 _Color;

  // Add instancing support for this shader. You need to check 'Enable Instancing' on materials that use the shader.
  // See https://docs.unity3d.com/Manual/GPUInstancing.html for more information about instancing.
  // #pragma instancing_options assumeuniformscaling
  UNITY_INSTANCING_BUFFER_START(Props)
   // put more per-instance properties here
  UNITY_INSTANCING_BUFFER_END(Props)

  //simplified intersection for axis aligned planes which only requires one component
  float GetAxisAlignedPlaneIntersection(float lineP, float lineDir, float planeP) {
   //planeP = t * lineDir + lineP
   //(planeP-lineP)/lineDir = t
   return (planeP - lineP) / lineDir;
  }

  //returns the next axis aligned plane that we are going to hit. planes are on each integer like 0, 1, 2, 3,...
  float2 GetNextAxisAlignedPlane(float p, float dir) {
   float signDir = sign(dir);
   float planeP = floor(p) + (signDir + 1) / 2;
   return float2(planeP, -signDir);
  }

  float2 GetUVs(float u, float v) {
   return float2(u - floor(u), v - floor(v));
  }

  float2 MoveUvsToRight(float2 uvs) {
   uvs.x /= 2;
   uvs.y /= 3;
   return uvs;
  }
  float2 MoveUvsToLeft(float2 uvs) {
   uvs.x /= 2;
   uvs.x += 0.5f;
   uvs.y /= 3;
   return uvs;
  }
  float2 MoveUvsToTop(float2 uvs) {
   uvs.x /= 2;
   uvs.y /= 3;
   uvs.y += 0.33333f;
   return uvs;
  }
  float2 MoveUvsToBottom(float2 uvs) {
   uvs.x /= 2;
   uvs.x += 0.5f;
   uvs.y /= 3;
   uvs.y += 0.33333f;
   return uvs;
  }
  float2 MoveUvsToBack(float2 uvs) {
   uvs.x /= 2;
   uvs.y /= 3;
   uvs.y += 0.66666f;
   return uvs;
  }
  float2 MoveUvsToFront(float2 uvs) {
   uvs.x /= 2;
   uvs.x += 0.5f;
   uvs.y /= 3;
   uvs.y += 0.66666f;
   return uvs;
  }

  void surf(Input IN, inout SurfaceOutputStandardSpecular o) {
   float3 lineP = IN.worldPos;
   float3 lineDir = -IN.viewDir; //view dir points at camera, but we need from cam to point

   float2 wallX = GetNextAxisAlignedPlane(lineP.x, lineDir.x);
   float2 wallY = GetNextAxisAlignedPlane(lineP.y, lineDir.y);
   float2 wallZ = GetNextAxisAlignedPlane(lineP.z, lineDir.z);

   float tX = GetAxisAlignedPlaneIntersection(lineP.x, lineDir.x, wallX.x);
   float tY = GetAxisAlignedPlaneIntersection(lineP.y, lineDir.y, wallY.x);
   float tZ = GetAxisAlignedPlaneIntersection(lineP.z, lineDir.z, wallZ.x);

   float2 uvs = float2(0.02,0.02);
   float3 n = float3(0, 0, 0);

   if (tX < tY && tX < tZ) { //we hit x first
    float3 wallP = lineP + lineDir * tX;
    uvs = GetUVs(wallP.z, wallP.y);
    n.x = -lineDir.x;

    if (sign(lineDir.x) > 0) {
     uvs = MoveUvsToRight(uvs);
    }
    else {
     uvs = MoveUvsToLeft(uvs);
    }
   }
   else if (tY < tX && tY < tZ) { //we hit y first
    float3 wallP = lineP + lineDir * tY;
    uvs = GetUVs(wallP.x, wallP.z);
    n.y = -lineDir.y;

    if (sign(lineDir.y) > 0) {
     uvs = MoveUvsToTop(uvs);
    }
    else {
     uvs = MoveUvsToBottom(uvs);
    }
   }
   else if (tZ < tX && tZ < tY) { //we hit z first
    float3 wallP = lineP + lineDir * tZ;
    uvs = GetUVs(wallP.x, wallP.y);
    n.z = -lineDir.z;

    if (sign(lineDir.z) > 0) {
     uvs = MoveUvsToBack(uvs);
    }
    else {
     uvs = MoveUvsToFront(uvs);
    }
   }
   else {
    discard;
   }

   o.Albedo = tex2Dlod(_TextureAtlas, float4(uvs,0,0));

   n = normalize(n);

   //o.Normal = n;
  }
  ENDCG
 }
  FallBack "Diffuse"
}


you mightve noticed that i commented the last line, where i assign the normal. The reason for this is that unity apparently tries to do more than just lighting using the normal, and the result is subsequently completely broken when assigning the normal. people are also welcome to tell me the fix for that. also here is the texture atlas i used for the shader

i know this is a non square texture, but i did that because im lazy, you could just squeeze it to a square and the shader will still work.

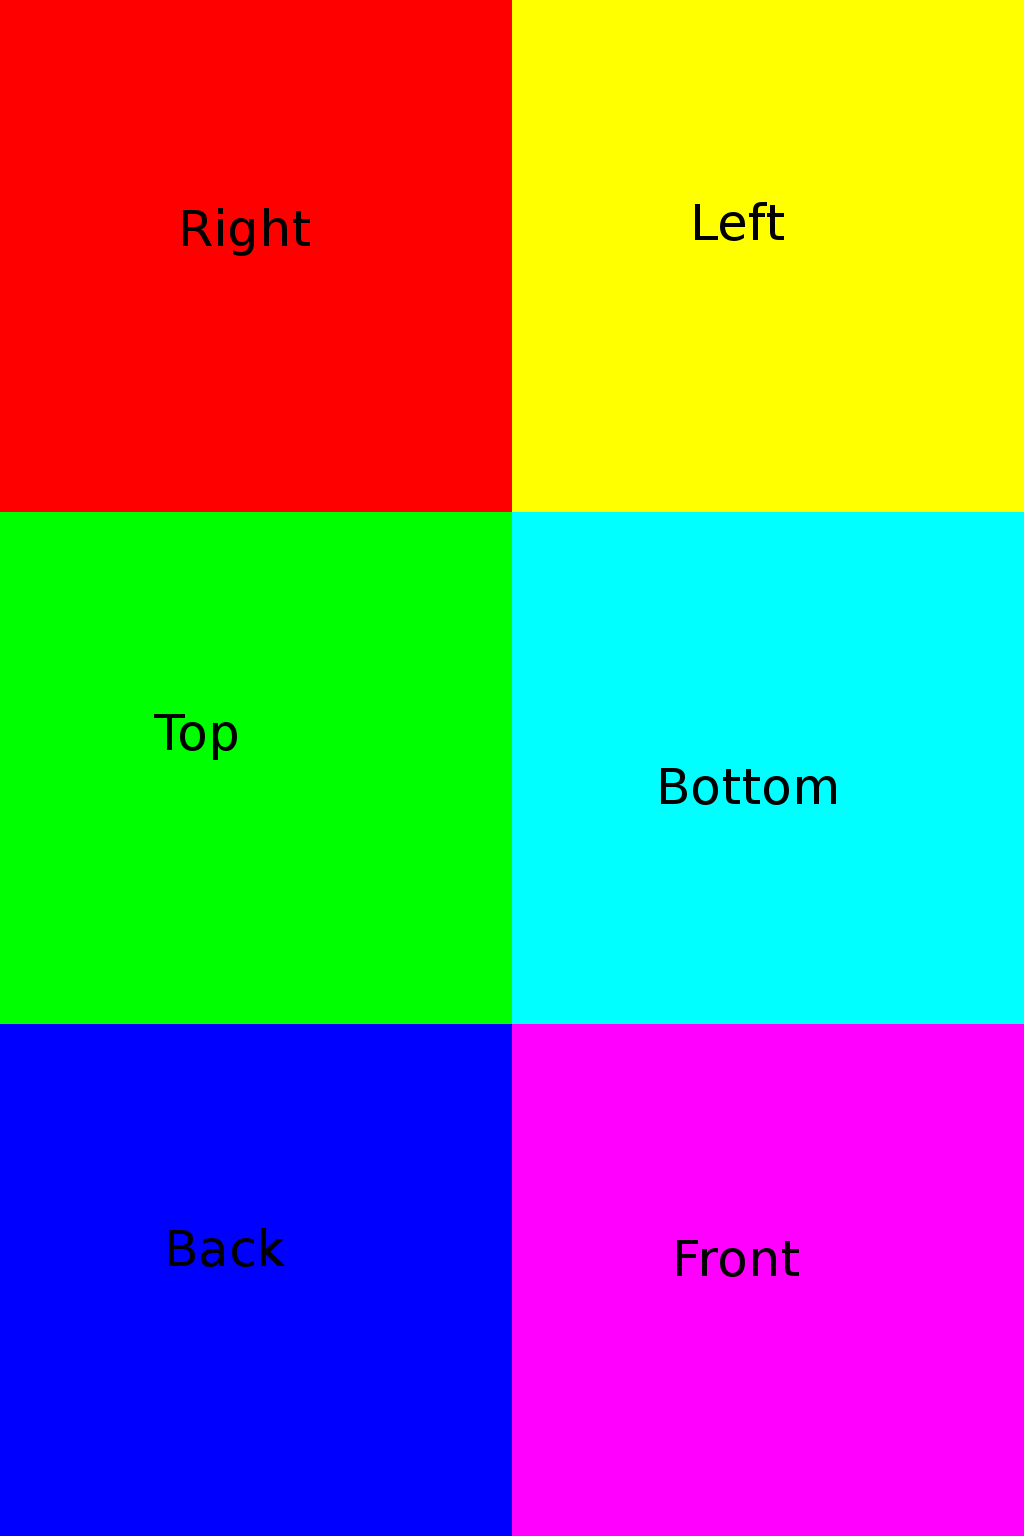
The whole shader can be converted to cycles nodes for use in Blender, but its a pain in the ass because some things are just missing (e.g. floor or sign functions). so have fun to whoever wants to implement it in cycles :P

Interior Mapping, The Theory

Ok so this is a little writeup on how interior mapping works. no images for now cause its late and im tired.

For those that have never heard of it, this is a technique to make rendering of many/endless rooms possible without having to actually generate the geometry for it.

I will word this write up for use with normal GPU shaders, but the math behind it can also be translated to any raytracer. This will also only cover the mapping of simple rooms of the same size with no objects inside, but the techniques described here can be extended to also achieve that

Interior mapping (short IM) utilizes ray tracing to procedurally generate the illusion of rooms that are made of geometry. For this to work we need the following:
  • world position of our fragment/pixel that we are rendering. (WP)
  • view vector pointing from camera to the pixel (VV)
Now comes the magic, using WP and VV we can now cast a ray into our virtual interior space. We only have to figure out which wall is hit by our ray, and where it hits, then translate that to UV coordinates that we can use to determine the color of our fragment/pixel.

Because we are limited to simpler programming constructs in a shader i seperated the components of the raycast. Ill describe the process for the X axis, but it is the same for the other axes. Using the axis value i calculate which walls are enclosing it, so e.g. 0.5 is enclosed by a wall at 0 and 1 (or any other division that you wish). Using this information i think up two planes that i can intersect my ray with. e.g. one at 0 with the normal (1,0,0) and one at 1 with the normal (-1,0,0). we now have 2 endless planes(walls) that encase my one dimensional coordinate 0.5. I now use the same component from my ray and calculate the t in 0 = 0.5 + t * ray.x .this will tell me a factor that i have to multiply the ray with till it hits that wall. to accelerate this, i examine the sign of the rays component, to figure out which wall it will hit (forward or backward). this gives me t_x, which tells me the factor for hitting the wall in X direction. now i do the same for y and z to get t_y and t_z. the lowest of those will tell me which wall pair i am going to hit first, x, y or z. again using the respective component from the ray i can figure out if it will be the left or right (respectively up,down,front,back) wall. i then calculate the point of the hit using WP+VV*t using the respective t. i then use the other two components left in the vector to generate my UV coordinates for the texture. i can then return the color, and optionally the normal of the wall, because i know which axis im on, and which wall i hit, of which i know the normal.

So thats basically it. you trace a ray to figure out which wall you hit. the magic is in how its done mathematically. in my actual implementation i did the tracing using a 3dimensional form, which can be useful for tracing objects inside a room that are not at axis aligned. i used the general equation of a plane and a line, and plugged them into each other. then i used wolfram alpha to solve for t to get the t needed to intersect the plane with the line

keep in mind that this is only one of the ways to achieve interior mapping. there are others, its up to you which one you want to use